Google Docs to a flash drive, download the file in your preferred format (Word or PDF). Then, insert the flash drive into your computer, and drag the downloaded file into the flash drive folder. Eject the flash drive safely and your document is now stored on it.
Easily safeguard your Google Docs by transferring them to a flash drive. Ever wondered how to safeguard your Google Docs beyond the cloud? Learn the quick steps to save your important documents to a flash drive and keep your work within arm’s reach. Unleash the power of portability with a simple click-and-drag process.
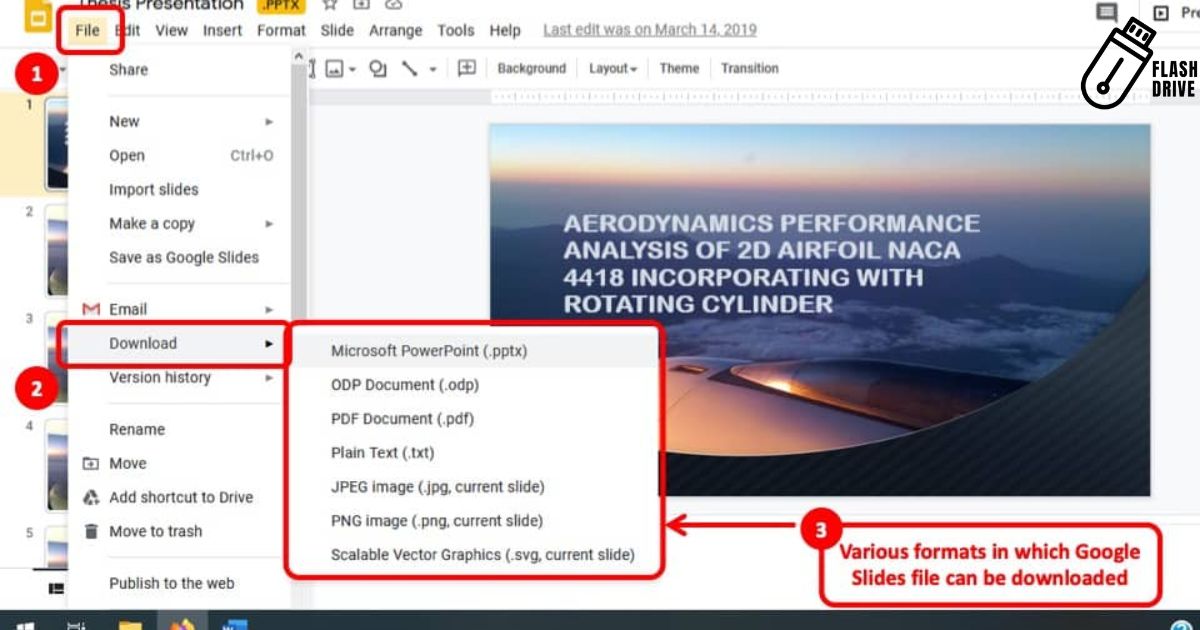
Simply open the document, click “File,” select “Download,” and save it to your computer. Plug in your flash drive, drag the file onto it, and voila your Google Doc is now on a flash drive.
How to Resume a Download in Firefox?
Wondering how to resume a download in Firefox and seamlessly transfer your Google Docs to a flash drive? Easy! Open Firefox, click on the three horizontal lines, access the “Library” locate your paused download, right-click, and choose “Resume.”
After completion, save the file to your computer. Plug in your flash drive and effortlessly drag the Google Docs file onto it. Now, your documents are securely stored on a flash drive for convenient access anytime.
How to Change Where My Browser Downloads Go?
If you are keen on altering your browser’s download destination, it is a simple process. Start by opening your browser settings, usually found in the menu or options. Look for the “Downloads” section and choose a new location on your computer.
Now, when saving your Google Docs to a flash drive, remember to download them to the desired folder on your computer first. After that, it is a matter of plugging in your flash drive and dragging the files from your chosen location onto the flash drive. Effortlessly manage your downloads and direct Google Docs to a flash drive with these straightforward steps.
How to Open Folder Properties on a Mac?
On a Mac, accessing folder properties is a breeze. Simply right-click on the folder and select “Get Info” from the menu. This opens the Folder Properties window, providing details about the folder’s size, location, and more.
Now, when dealing with transferring files like Google Docs to a flash drive, check the folder’s properties to ensure there’s enough space. Once confirmed, proceed by plugging in the flash drive, right-clicking on the folder containing your Google Docs, and selecting “Get Info” again to verify the size before smoothly transferring your Google Docs to a flash drive. With these easy steps, managing folder properties becomes seamless on your Mac.
How to Convert to PDF From Adobe Photoshop CS5?
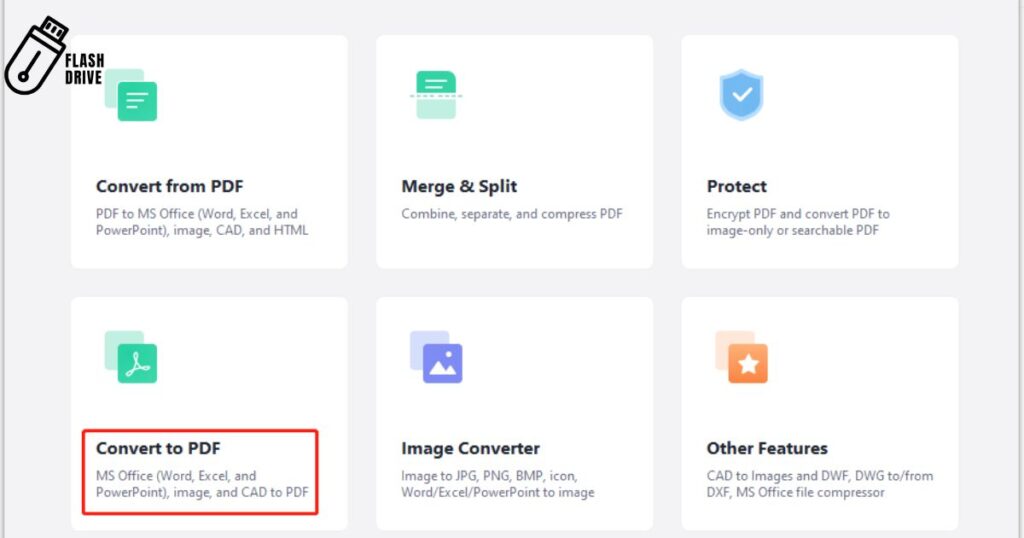
Converting files from Adobe Photoshop CS5 to PDF is a breeze! Start by opening your Photoshop document, then click on “File” and select “Save As.” Choose the PDF format from the dropdown menu and save it to your computer. Once the conversion is complete, access the saved PDF on your computer.
Now, if you want to transfer this PDF, like Google Docs to a flash drive, simply plug in your flash drive, locate the PDF file, and drag it onto the flash drive. With these simple steps, you can seamlessly convert and transfer your files, including Google Docs to a flash drive, using Adobe Photoshop CS5.
How to Open a WFC File?
Opening a WFC file is a breeze. Simply locate the file on your computer, right-click, and choose the appropriate program to open it. For secure storage or sharing, save the contents from Google Docs to a flash drive by downloading the file to your computer and then dragging it onto the flash drive.
Top of Form
Google Docs to a flash drive?
To save your Google Docs to a flash drive, open the document and click “File.” Then select “Download” and save the file to your computer. Plug in your flash drive, and simply drag the downloaded Google Docs file onto it – that’s how you move your Google Docs to a flash drive effortlessly
How to Make a Menu on Google Docs?
- Open Google Docs and create a new document.
- Set the document orientation to landscape for a traditional menu layout.
- Use the “Insert” menu to add a table with the desired number of rows and columns.
- Customize the table by adjusting cell sizes and formatting as needed.
- Enter menu categories or sections in the first row, such as “Appetizers,” “Main Course,” and “Desserts.”
- List specific menu items in the subsequent rows under each category.
- Apply formatting options like bold or italic to enhance the appearance of your menu.
- Insert images or icons alongside menu items for visual appeal.
- Utilize fonts and colors that align with the theme or style of your establishment.
- Save and share your menu by clicking on “File,” then “Download,” and choose the format you prefer, such as PDF, for easy distribution.
How to View Pages Side by Side in Google Docs?
To seamlessly view pages side by side in Google Docs, follow these straightforward steps. Begin by opening your document in Google Docs. Head to the “View” menu and effortlessly select “Side by Side.” This feature empowers you to compare and edit two pages simultaneously, significantly boosting your workflow.
If you prefer an alternative, navigate to the “View” menu and choose “Split screen” to divide the document window into two sections, either horizontally or vertically. Now, let’s delve into securing your work with a different aspect of Google Docs to a flash drive. This method ensures accessibility and protection, even offline.
To accomplish this, insert the flash drive, open Google Docs, select the desired document, and click on “File.” Opt for “Download” thrice and save the file to your flash drive for added convenience and peace of mind. With these user-friendly features, you can effortlessly enhance your Google Docs experience while safeguarding your important files with the ease of saving Google Docs to a flash drive.
How to Install Google Chrome on an External Hard Drive?
| Step | Instructions |
| 1. | Connect your external hard drive to your computer. |
| 2. | Open a web browser and navigate to the Google Chrome website. |
| 3. | Locate the “Download Chrome” button and click on it. |
| 4. | Choose the installation options and select your external hard drive as the destination for installation. |
| 5. | Follow the on-screen prompts to complete the installation process. |
| 6. | Once installed, open Chrome from your external hard drive. |
| 7. | Customize Chrome settings according to your preferences. |
| 8. | Consider creating a shortcut on your desktop for easy access. |
| 9. | Safely eject your external hard drive when finished using Chrome. |
| 10. | You can now run Google Chrome directly from your external hard drive on any compatible computer. |
How to View a PDF in PowerPoint?
To seamlessly integrate a PDF into a PowerPoint presentation, follow these simple steps. First, open your PowerPoint presentation and navigate to the slide where you want to insert the PDF. Next, click on the “Insert” tab and select “Object” from the drop-down menu.
Choose “Adobe Acrobat Document” and browse to locate your PDF file. Ensure the “Link” option is selected for real-time updates. To enhance collaboration, consider converting the PDF to Google Docs to a flash drive.
This dual approach not only streamlines the integration of Google Docs but also ensures portability and easy access on different devices. Embrace the efficiency of incorporating Google Docs into your workflow, facilitating seamless transitions from Google Docs to a flash drive for enhanced convenience and accessibility.
FAQ’s
How do I save a Google Docs document to my computer?
Open your Google Docs document, click on “File,” select “Download,” and choose a preferred format like PDF or Word. Save the file to your computer.
Can I save Google Docs directly to a flash drive?
Yes, after downloading the document to your computer, plug in your flash drive, open the file location, and drag the downloaded document onto the flash drive.
What if I need to access my Google Docs offline from a flash drive?
Simply ensure you have downloaded and saved your Google Docs file to your computer first. Then, plug in the flash drive to transfer the document and access it offline anytime, anywhere.
Description
In conclusion, transferring your Google Docs to a flash drive is a straightforward process that ensures convenient access and backup for your important documents. To save Google Docs to a flash drive, begin by opening the document you wish to export. Next, click on “File” in the upper-left corner, select “Download,” and choose the desired format, such as Microsoft Word or PDF.
Once the file is downloaded, insert your flash drive into the USB port, locate the file on your computer, and drag and drop it into the flash drive folder. This quick and efficient method not only safeguards your documents but also provides a portable solution for accessing your Google Docs on various devices.
In summary, mastering the art of saving Google Docs to a flash drive empowers you with flexibility and security. By incorporating this simple process into your routine, you ensure that your important files are readily available and protected, enhancing your overall digital organization and peace of mind. So, remember the key steps: download your Google Docs, insert the flash drive, and effortlessly transfer your documents for convenient and secure storage.